If your product type has an Installation Helper available you can use it to install, configure and/or deinstall your network of nodes.
Installation Planner
The Installation Planner viewset is generally used by a user that has the Role of Administrator. This person will select the measurement points to be installed, repaired and/or removed and put them into one Installation Helper list, together with any required information for that measurement point type.
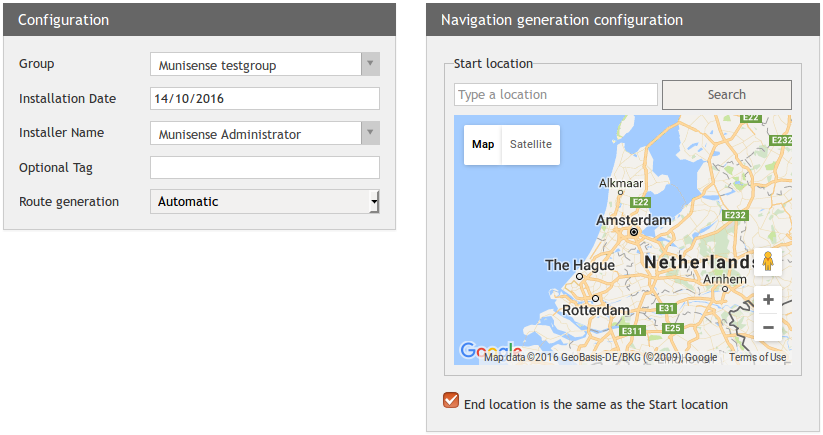
The route generation option determines the ordering of the selected measurement points. "Automatic" will create an optimal route between the measurement points that can be followed by car or on foot. "Ordered A-Z" will order the list of measurement points alphabetically by name.
The User selected in the Installer Name field will be the person doing the actual installation. This person will use the Installation Helper viewset to visit the location of each measurement point and perform the required work on the node (installing, replacing, removing, etc.)
Measurement points selection

This step of the planner allows you to select the measurement points that will be used in the installation. Using the Selection dropdown you can filter the list to show only the measurement points of a certain group and clicking the Add all link will add all of them to the list at once.
Route calculation
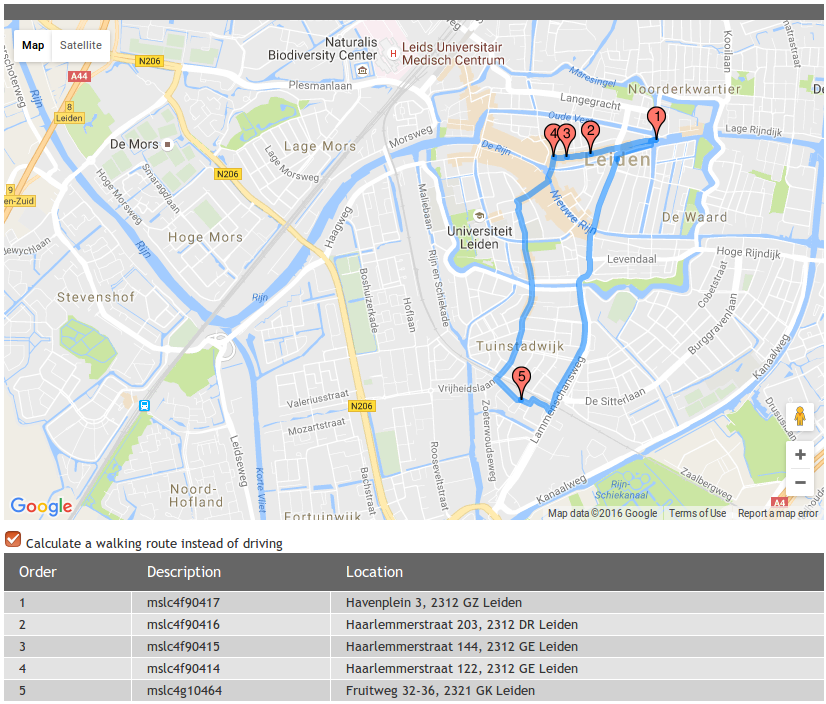
This step will calculate the optimal route to visit all measurement points. It is possible to let it calculate a walking route instead by checking the checkbox. After the calculation is done, you can save it and the installation helper will be ready to be used.
Note: When you selected "Ordered A-Z" earlier, this step can simply be skipped by pressing the Save button directly.
Installation Helper
When the Installation Helper viewset is opened, a list of all active installation helper items for the currently logged in person is shown, filtered on group.
Start the installation
Clicking "Go" on one of those items will start the installation. The page you start at depends on the Route Generation choice made by the planner.
Ordered A-Z
If the Installation Helper was configured to use measurement point sorting by name, you will start at the Location list view.
Automatic
If "Automatic" was chosen you will start at the Location tab of the first measurement point of the calculated route.
Location Tab
The current location of the measurement point is displayed in the map, together with the previous and next measurement points or the start/end of the route (if route generation is Automatic). The blue marker with the dot in in represents your current location, which is requested from the browser, that probably asked you to allow it to pass that information to the Portal.
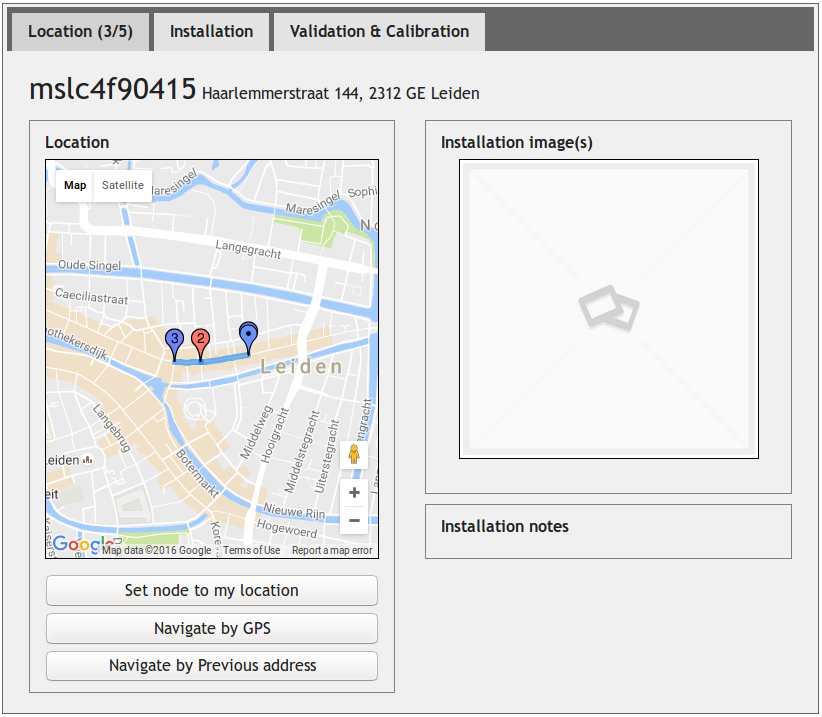
Clicking the Set node to my location button will change the location of the measurement point to your current location, allowing you to accurately set the location.
The Navigate by GPS and Navigate by Previous Address buttons will lead you to a google maps route page, so you can follow its directions to the next measurement point.
The Installation image(s) area shows all installation images coupled to this measurement point and the Installation notes area displays any previously set note.
Installation Tab

The Configuration area holds all configuration fields specific to the measurement point type. In the screenshot above there are no such fields, leaving only the node selection and optional notes field, which are always present. Filling in any configuration fields and saving them with the Save configuration button is required to mark the measurement point as processed.
The Installation image(s) area shows all installation images and allows the installer to add one using the Browse button and, after that, pressing the Submit button to upload the image to the Portal. Every measurement point needs to have at least one uploaded image to be marked as processed.
Validation & Calibration Tab
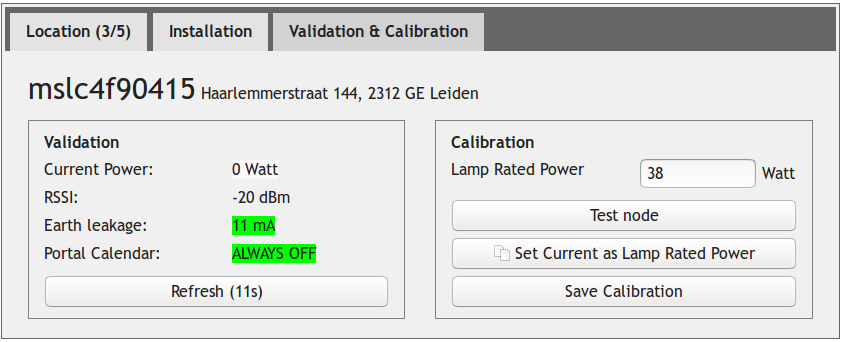
In the Validation area all relevant information for the measurement point type is shown, in the screenshot above that is a Streetlight, which reports values for earth leakage and its internal calendar and has an option to test the connected node, which will turn the light on. When any calibration values have been set, they can be written to the measurement point using the Save Calibration button. This is also a required step for the measurement point to be marked as processed.
Navigation buttons
At the bottom of the installation helper several buttons are always present.
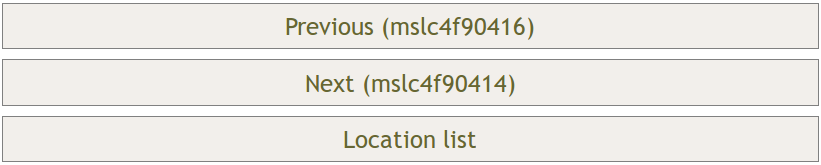
The Previous and Next buttons will take the installer to the previous or next measurement point, respectively. When you are currently at the first or last measurement point, these will take you back to the list instead.
Location list
Here you can choose which measurement point to work on.
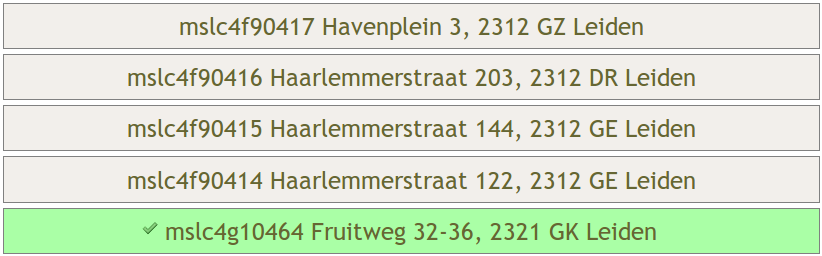
Measurement points will be marked as processed, shown in green, when all of the following conditions are met:
- The configuration has been saved
- At least one installation image is present
- The calibration has been done
When all measurement points have been processed, the installation is finished.
0 Comments