Introduction
So you have successfully installed a water level sensor, great!
The next step is for you to be able to see the incoming data in the portal. There is a difference between a Ground Water Well (physically, with a certain location) and the sensor that is installed in that well. The portal uses this concept as well. For every Ground Water Well you can create a new Ground Water Well object in the portal. Lets create one.
Creating a new Ground Water Well
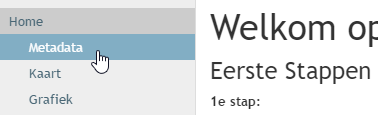
Open the Metadata page in your portal.
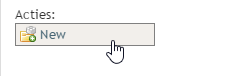
On this page click the New button. If you already have Ground Water Well objects they are shown as a list on this page.
You are now presented with a form to create a new Ground Water Well object.
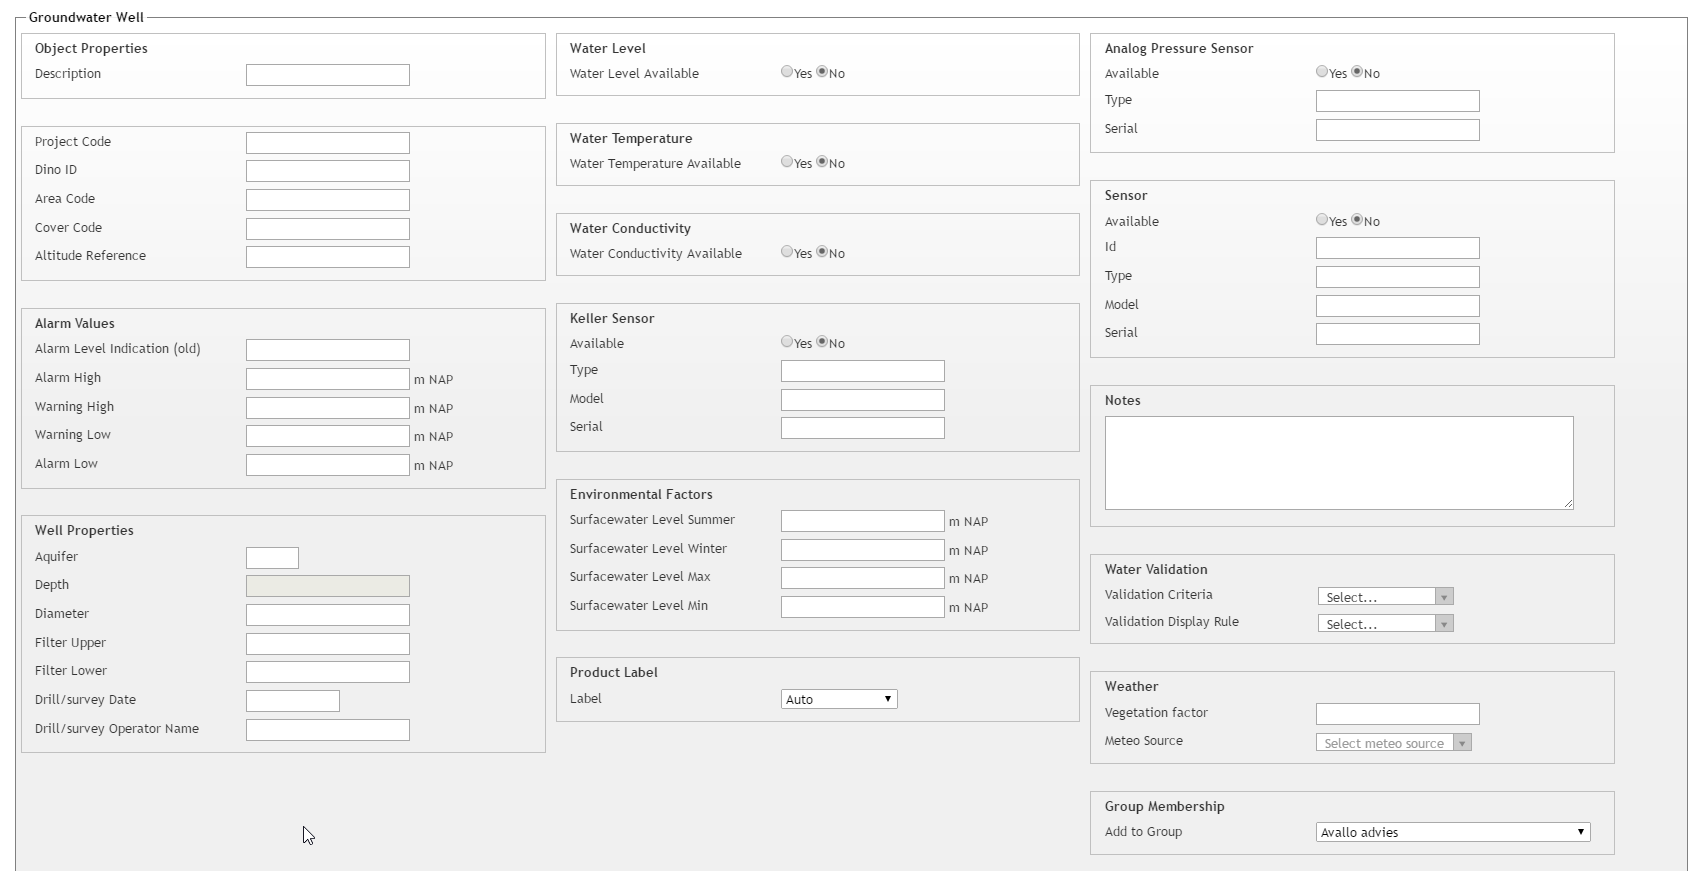
Even though this a quit a large form, you don't have to fill in everything. In the most basic form you would only enter a Description. This description is used to identify this specific Ground Water Well.
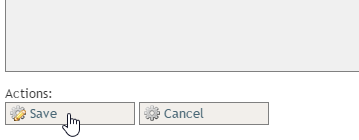
After filling in a description, click the Save button.
You will now be taken to the detail view of this Ground Water Well. In this view you need to enter some more information about the Ground Water Well.
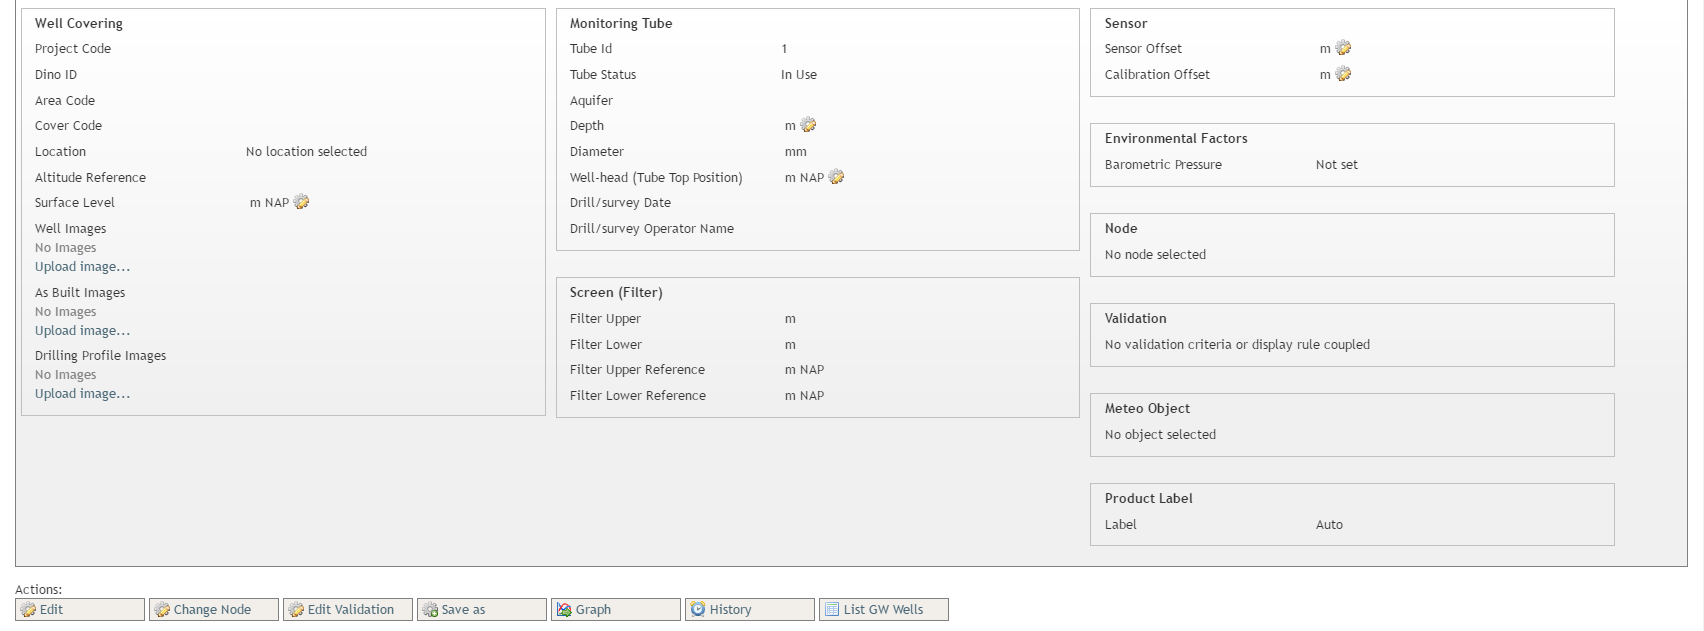
Coupling a sensor to the Ground Water Well
We start by coupling a water sensor to this Ground Water Well. Click the Change Node button. Select the Pressure option here.
Under Pressure Source select the sensor that has been installed in the well. Then select the Baro Source you would like to use. And finally select the time when the sensor was installed in the well (Since). Now go ahead and click the Change Sources button to save this information.
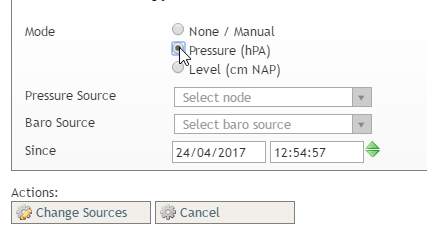
We have now coupled a sensor to the Ground Water Well!
Filling in metadata
The next step is to fill in some metadata about the Ground Water Well. The things that we want to fill in are:
- Surface Level (NL: Oppervlakte niveau/maaiveldhoogte)
- Tube Depth (NL: Buis Diepte)
- Tube Well-head (NL: Kop Peilbuis)
- Sensor Offset (NL: Installatiediepte tov kop peilbuis)
All of these properties can be changes by using the cogwheel icons. E.g. to change the Surface Level:
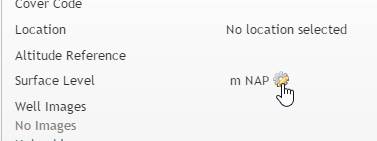
If you click on this icon you will be presented with a form to create a new value. Click the Create button.

A form will appear allowing you to enter a value. In this example the value is set to 25.10 (relative to NAP)

If you go back to the detail page now, you will see the Surface Level being set now.

The same principle applies to filling in the other values.
Note: the Sensor Offset (NL: Installatiediepte tov kop peilbuis) must be filled in negatively (!) since the sensor hangs under the well head.
Adding a manual measurement
We can also add a manual validation measurement. From the detail page, click Edit Validation.

The following form allows you to enter a validation measurement. These measurements are shown in the graph as red dots.
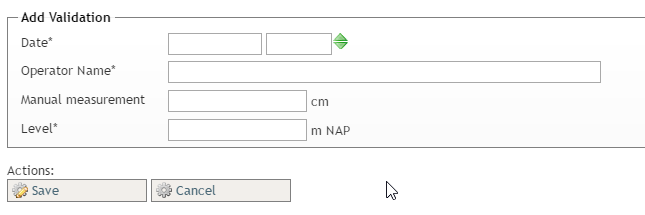
Usually you enter the Manual measurement field here (besides the Date and Operator Name). This value is relative to the well-head and must be filled in as a positive number. The Level is calculated automatically. Now click Save and we are done.
That's it! You have now created a Ground Water Well, coupled a sensor to it, entered metadata information and maybe even added a manual validation measurement.
0 Comments